My classic scooted chocolate chip cookie recipe made with Bob’s Red Mill 1:1 Gluten free Flour to get the same chewy corners and gooey centers yet gluten-free. Makes 15 large cookies or 30 small cookies.
This post may contain affiliate links. Read the disclosure policy here.
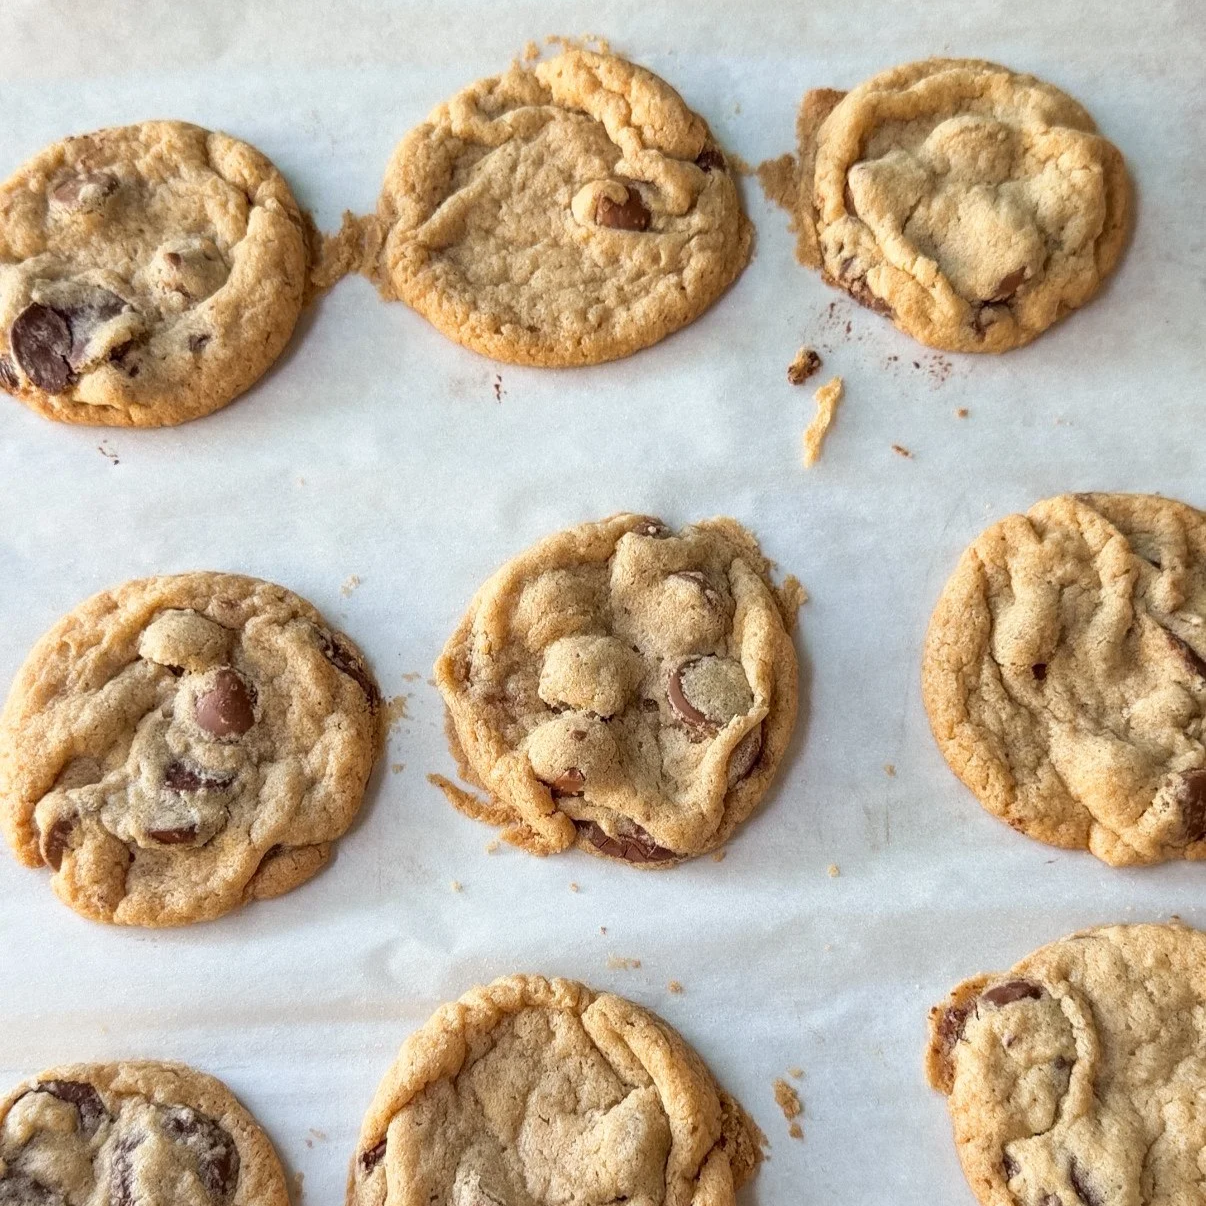
I never thought I would be able to make a gluten-free cookie that was so good you didn’t know it was gluten-free.
I have been making gluten-free variations and desserts for over a decade for friends who can’t tolerate gluten. Usually I would operate in the tried and true categories that gluten-free flour thrived in: brownies, cakes, quickbreads, and muffins. My few attempts at pastry and cookies were frankly, gross. They tasted gritty and had a weird aftertaste.
Then about a month ago someone reached out and told me that she had made my cookies with great success using Bob’s Red Mill Gluten-Free 1:1 Flour. I was both shocked and delighted because I hadn’t tried that (and honestly never would have), and her message gave me the courage to try when Bob’s Red Mill was actually working with me to promote that same flour.
There are a few changes to the original recipe, namely, a chilled rest to make sure the flour absorbs moisture and dough sets up but other than that the recipe is virtually the same. And the cookie itself is nearly identical.
While there is a huge range of chocolate chip cookie preferences, I believe this cookie is a crowd pleaser. It has chewy edges that you can tear away in large chunks while it is still warm, and a soft center that melts in your mouth. This cookie was adapted from my mom’s original Oatmeal Chocolate Chip Cookie, which I grew up eating at any gathering or visit home and is the reason I love baking for others.
This is a gluten-free variation of my Scooted Chocolate Chip Cookies, named for the essential step of scooting the cookies at the end of baking. The scooting method came from Erin Clarke at Cloudy Kitchen, and I am eternally grateful for it because they made this masterpiece of a cookie possible.
Frequently Asked Questions
Can I use a different Gluten-Free Flour? Not all gluten free flours are created equal, and some are best suited for other uses. I can’t guarantee that the cookie will turn out as well as it did here like I could if you used a different brand of all-purpose flour. Feel free to experiment with other flours if you already have them, and check out Bob’s Red Mill next time you’re at the grocery store.
Can these be made in advance? I do find that the shelf life of this cookie is shorter than the other cookie. It tastes best if eaten within the first couple of days. For freezing, I would freeze the dough and bake at 350°F (25° less).
Tips for the best cookie
Don’t overbake. You’ll just start to see the browned edges on the cookies, but if you wait until they are too brown they will dry out.
Scoot as soon as they come out of the oven. Have your countertops clear so you have somewhere to set the hot pan, and then get to scooting right away. For smaller cookies I use a ramekin, and for larger cookies I use a 2 cup pyrex dish.
Measure the flour by weight. Whenever you bake you’ll get the best most consistent results measuring the flour by weight. If you overmeasure, the cookies will come out thicker than what is pictured below.
Use a beater with a rubber scraper. I recently started using the Kitchenaid attachment with a rubber scraper, and it mixes things so much more quickly and thoroughly than the standard beater attachment.
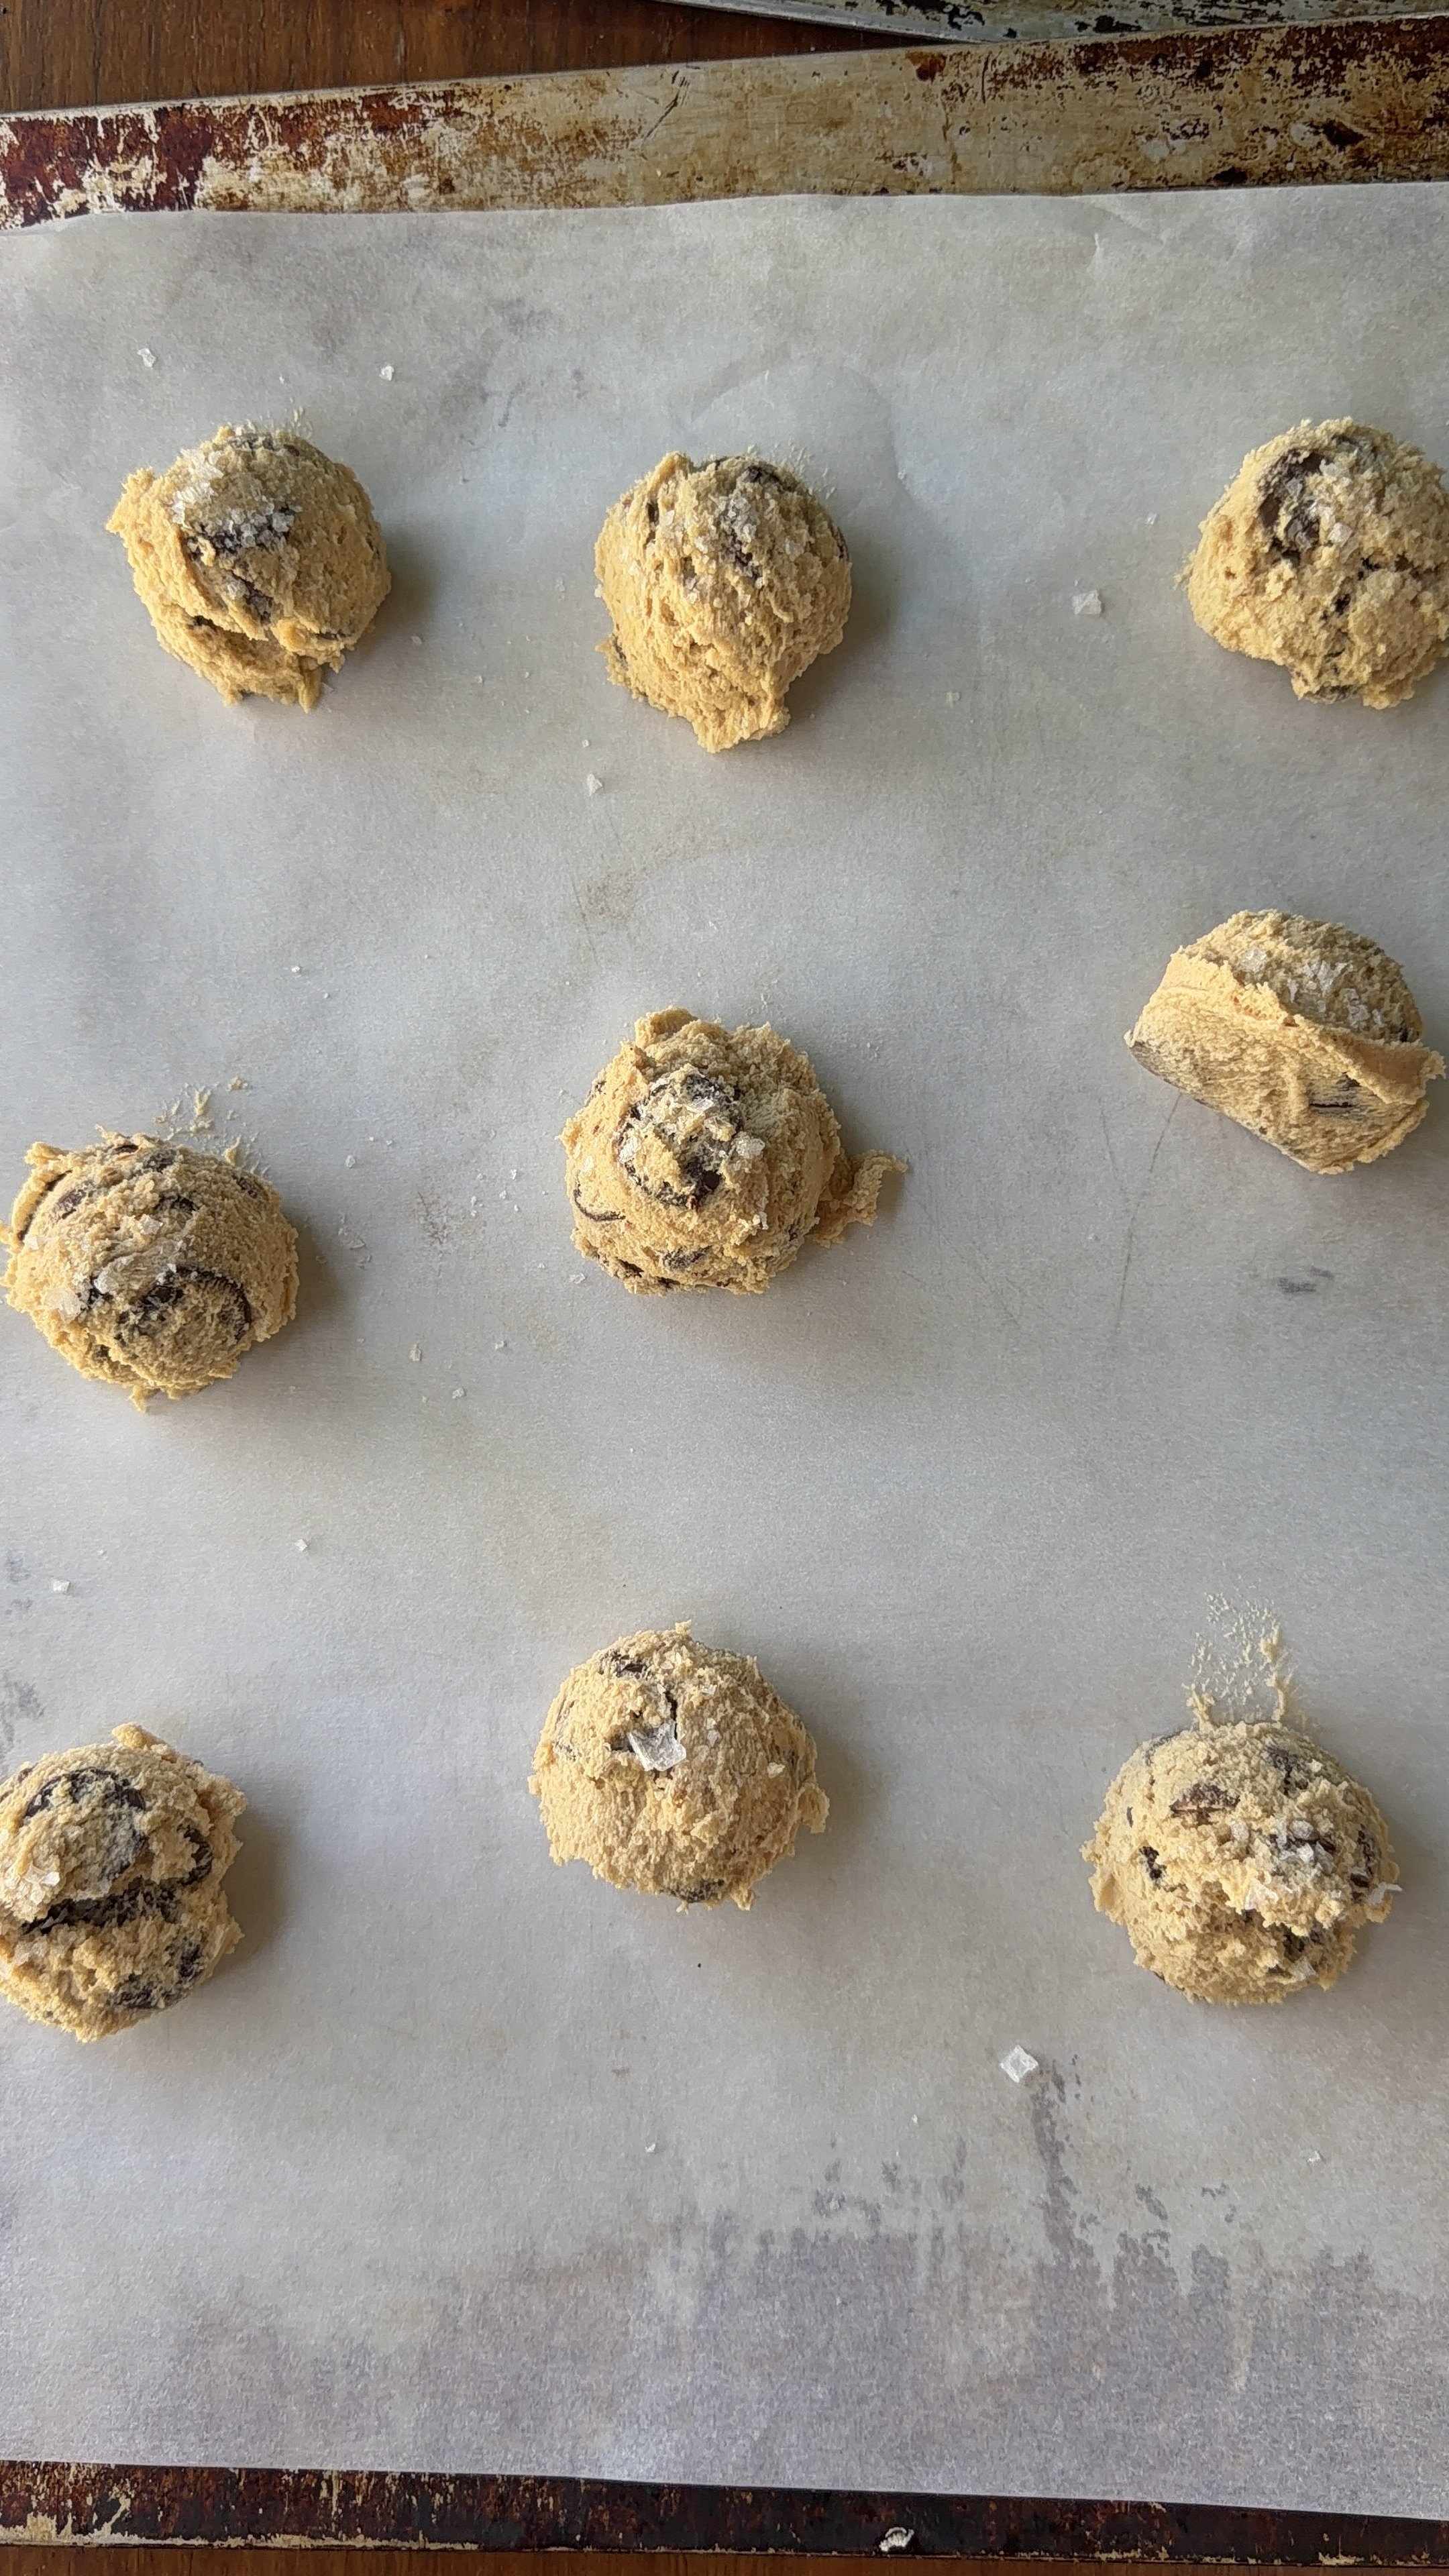
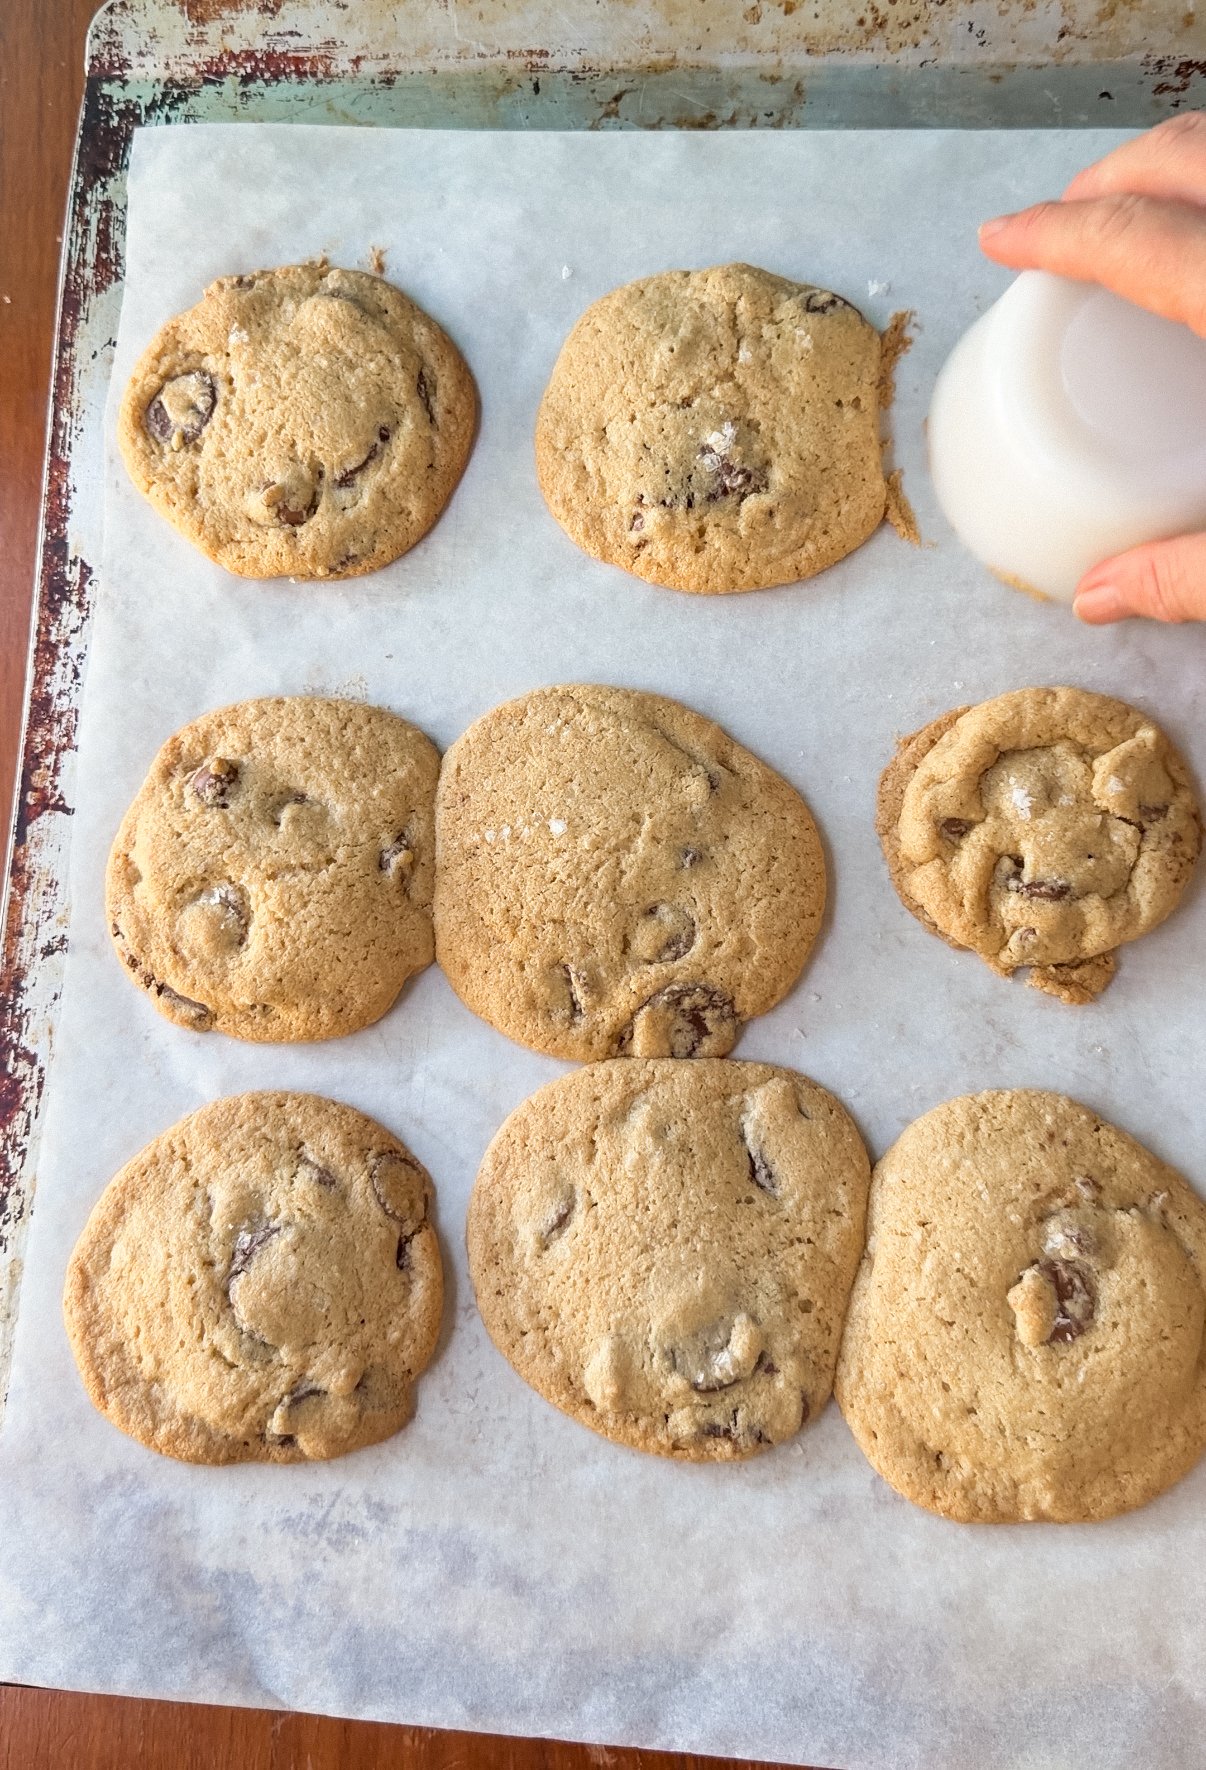
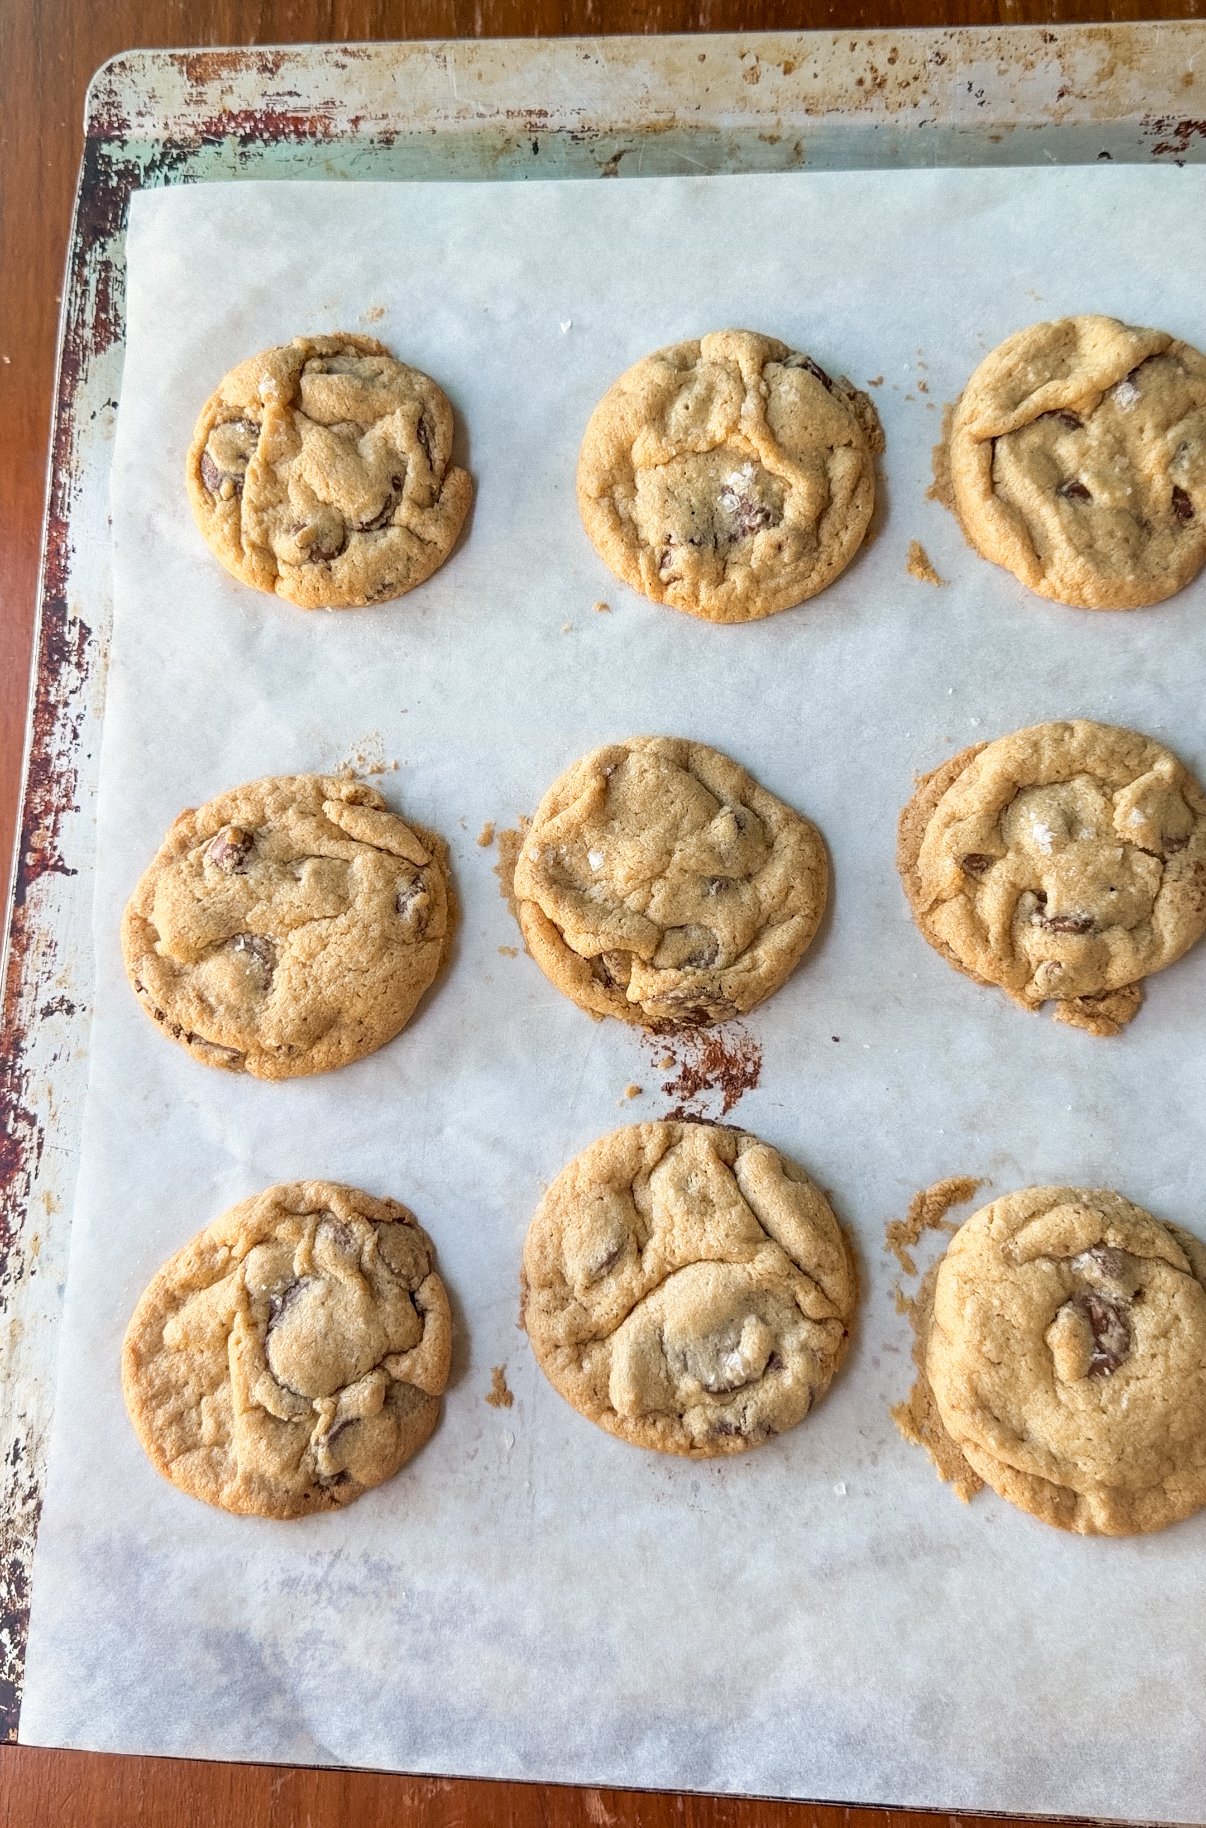
Ingredients
2 sticks Butter (226gr), cold from the fridge: For flavor and texture
½ cup Sugar: For sweetness and texture
1 cup Brown sugar: For softer texture and caramel flavor
3 large Egg yolks: Provides richness and helps bind everything
1 ½ teaspoon Vanilla: For flavor
1 ¼ teaspoon Sea salt: To bring out the sweetness and balance flavors
½ teaspoon Baking powder: A leavening agent
½ teaspoon Baking soda: A leavening agent, and helps with spread and crispy edges
300 grams (about 2 cups) Bob’s Red Mill Gluten Free 1:1 Baking flour: To act as a base for the dough, 2 cups measured by volume fluffed up with a fork
1 ½ cup Semisweet or dark chocolate chips or chunks: Use your favorite baking chocolate
1 ½ cup Milk chocolate chips or chunks: Use whatever you have on hand

This image is borrowed from the original Scooted Chocolate Chip Cookie recipe, so the flour may look different.
Equipment you’ll need:
Electric stand mixer or hand mixer: To mix the dough
Measuring cups: To measure the sugar and chocolate chips
Kitchen scale: To measure the flour, for better accuracy
Measuring spoons: To measure the leavening agents and vanilla
Small bowl: For separating the yolks from the eggs
Baking pan or cookie sheet: For baking the cookies
Parchment paper: To line the cookie sheet for baking
4 inch (2 1/2 cm) round bowl or cookie cutter: To scoot the cookies after baking
Step by Step Recipe:
Cut the cold from the refrigerator butter into 1/2” cubes and add to the mixer with both sugars. Mix on low until it starts to clump up, then turn mixer to medium & mix for five minutes. I like to set a timer and walk away, only coming back to scrape the bowl one or two times. When the butter and sugar are ready, they will have lightened in color considerably due to the air incorporated into the butter.

Scrape the sides bowl, & add the egg yolks one at a time, scraping the sides of the bowl to make sure it is thoroughly mixed. After you add the third yolk, add the vanilla and mix for about one minute. The batter will start to look fluffy and smell delicious.
Add the baking soda, baking powder, and salt, and mix for ten seconds.
Flour measuring options:
Sifted flour* (medium accuracy) measured by volume: 2 cups
Measured flour by weight: 300 grams
*To sift flour you can use a sifter or, thoroughly whisk the flour with a fork or a whisk. Then carefully scoop the flour into your measuring cup with a large spoon, once you have a little bit extra then level the flour with the flat side of a knife; do not shake to level.
Add the flour to the mixer and mix on low until almost no flour is visible, then turn off the mixer. Add the chocolate chips all at the same time.
Mix on low for about 10 seconds then finish the mixing by hand, making sure you’re scooping the dry bits up from the bottom.
Cover the mixing bowl with plastic wrap, then let the dough rest in the refrigerator for 30 minutes up to an hour. While the dough is chilling, preheat the oven to 375°F (190°C).
Using a 2 tablespoon cookie scoop, put 9 dough balls evenly apart on a baking sheet lined with parchment paper. Bake for 10-12 minutes two sheets at a time, rotating and switching racks halfway through. Cookies are done when the edges are starting to turn golden and they start to puff up in the center. They will sink as they cool. They will also have spread a bit which makes this next part even more important.
While the cookies are fresh from the oven (within the first 90 seconds), “scoot” with a 5” diameter round bowl or biscuit cutter by using the rim and gently nudging the cookie together into a smaller circle. This technique makes the cookies more dense and gooey and ensures a uniform chewy edge.
Cool for 5 min to ten minutes before eating.
Can I make these cookies larger?
To make larger (4 tbl size) cookies, bake 5 cookies (arranged in the shape of a 5 on a dice) per parchment lined baking sheet for 10-12 minutes, rotating halfway through. Scoot with a 6” diameter round bowl or biscuit cutter while still hot from the oven.
Can this recipe be doubled?
I have a large Professional size stand mixer, and this recipe barely fit in it when doubled. If you plan to double, make sure your mixing bowl is at least 7 quarts. A hand mixer would not be able to handle a double batch of this recipe.
Can this recipe be halved?
It would be tricky to half it since you’ll have to measure out half of an egg yolk, but you could if you needed to. I would recommend just freezing the other half of dough in an airtight container for another time.
Can I make this ahead of time?
Yes, you can make the dough and freeze in an airtight container or resealable bag for up to 2 months. I like to let the dough thaw on a cookie sheet while the oven preheats. If baking from frozen, reduce cooking temperature to 350 F and bake closer to 15 minutes. You can also mix and store covered in the fridge for up to 3 days and bake at 375, adding a couple more minutes to the bake time.
What are the “special techniques” you mentioned for this recipe?
There are three special techniques that are essential to this recipe:
1) Cutting the cold butter into cubes, which saves time by preventing you from having to wait for the butter to reach room temperature (a trick I learned from Tawnie at Kroll’s Korner)
2) Scooting the cookies when they are finished baking, but still hot from the oven. Cookie scooting is done by using a round item, like a cookie cutter or an upside down bowl to scoot a cookie that is spread too far. In the case of this recipe, it is essential and helps create a gooey more dense center for the cookie. Scooting must be done while the cookie is still hot from the oven and before it starts to cool, otherwise the edges will have set.
3) Using egg yolks without the whites. Egg whites contain a lot of water which causes the cookies to spread and can dilute the flavor. Egg yolks help combine and emulsify the ingredients and create a rich gooey texture in the cookie.

Scooted Chocolate Chip Cookies
Chocolate chip cookies with chewy corners and gooey center, perfect for dipping in a glass of milk (and unbelievably gluten-free)
Ingredients
Instructions
- Cut the cold from the refrigerator butter into 1/2 inch cubes. Add butter and sugars to the mixing bowl of a stand mixer with the paddle attachment.
- Start the mixer on low speed until it starts to clump up, then increase to medium speed and mix for five minutes, scraping the bowl one or two times. Mixture should lighten to a soft beige color as air is incorporated.
- Scrape the bowl a third time then add the egg yolks & vanilla. Mix on medium high for about one minute, then scrape the bowl again.
- Add the salt, baking powder, baking soda, and flour (fluff flour with a whisk if you’re not measuring by weight, though measuring by weight is the most accurate) & mix on low until almost no flour is visible.
- Stop the mixer & add the chocolate chips. Mix on low for about 15 seconds then finish the mixing by hand with a large rubber scoopula, making sure you’re scooping the dry bits up from the bottom.
- Cover the mixing bowl with plastic wrap and chill in the refrigerator for thirty minutes up to one hour. Preheat the oven to 375°F while the dough is chilling.
- Using a 2 tablespoon cookie scoop, put 9 dough balls evenly apart on a parchment lined baking sheet. See recipe notes for larger cookies.
- Bake for 12 minutes, rotating the pan halfway through. Repeat until all cookies are baked.
- Don't skip this step: Scoot cookies (see notes if you're not familiar with cookie scooting) with a 4” diameter round bowl or cookie cutter while still fresh from the oven to clean up the sides.
- Cool for 5-10 min & enjoy.
Notes
What is cookie scooting? Cookie scooting is using a round item, like a cookie cutter or an upside down bowl to scoot a cookie that is spread too far. In the case of this recipe, it is essential. Scooting must be done while the cookie is still hot from the oven and before it starts to cool, otherwise the edges will have set. For this recipe, it helps create a fudgey more dense center of a cookie.
To make larger (4 tbl size) cookies, bake 5 cookies per parchment lined baking sheet for 10-12 minutes, rotating halfway through. Scoot with a 6” diameter round bowl or biscuit cutter while still hot from the oven.