Spongey vanilla cake flavored with citrus zest, a homemade vanilla bean ice cream filling, and strawberry and blueberry sauce. Top with whipped cream and fresh berries for the perfect celebratory summer dessert. Serves 10-12.
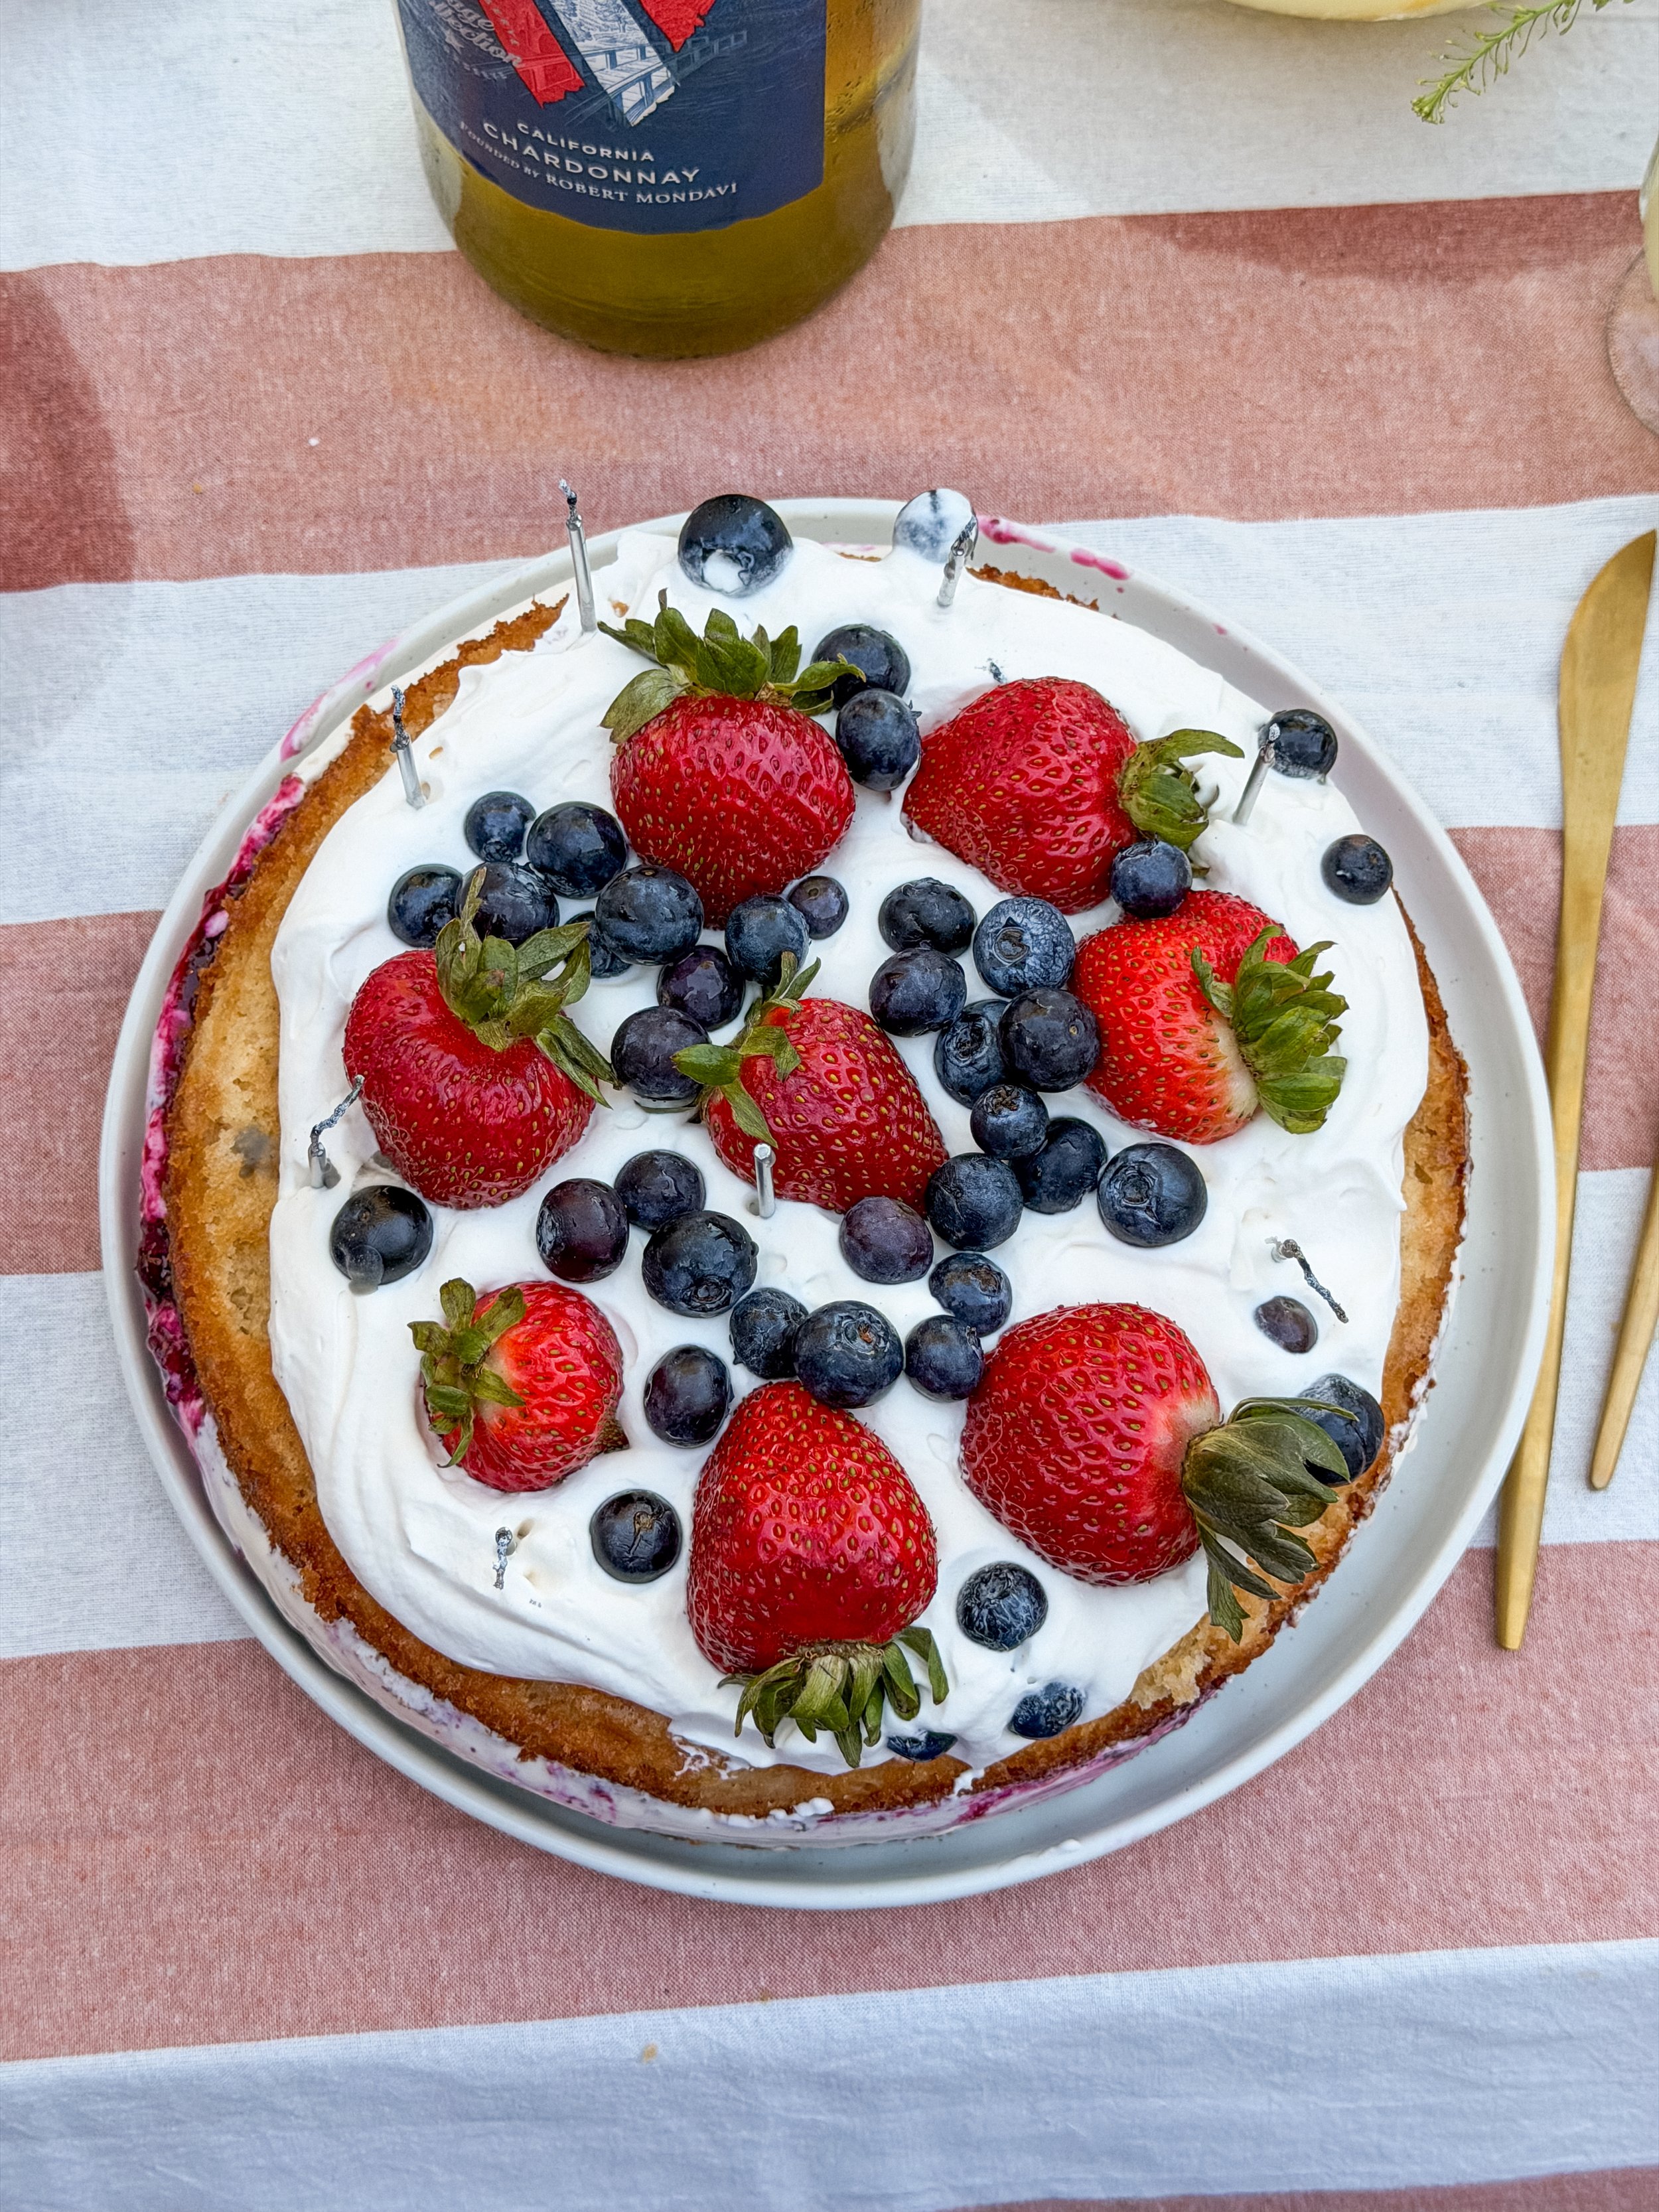
Your next summer get together needs this ice cream cake! I’ve never been a lover of traditional buttercream frosting, so my ideal cake usually finds a way to not have a true frosting in it. I developed this recipe when I was getting ready to host an elevated summer BBQ, but wanted to do something that matched the Red, white and Blue theme, and had a nod to the warmer summer weather and seasonal produce. This bright and Americana summer inspired cake checks all of the boxes.
I borrowed the sponge recipe for the Curd, Cream and Berry Cake from Dorie Greenspan’s book Baking with Dorie. I love this recipe because it’s relatively easy, and while it has a little bit of an unconventional method (whipping the sugar and egg whites for volume), it also makes only a single sponge, which is perfect for an ice cream cake.
The recipe is quite long, and gives the impression of a complicated recipe, and it is with all the components being made from scratch, but none of the recipes are difficult to make. Fortunately, this recipe can also be made in advance as needed, so if you need to break it up over a few days that’s totally doable. You could also save yourself some time by using storebought ice cream and whipped cream.
Here are the main steps:
Step 1: Make the ice cream base and chill at least 8 hours if possible.
Step 2: Make the cake. If making in advance, then cut in half lengthways and place a sheet of parchment in between the layers. Cover tightly in plastic wrap and freeze. If just making the next day then wait to cut it, and cover with plastic wrap once cool.
Step 3a: Make the strawberry sauce. Store in an airtight container in the refrigerator.
Step 3b: Make the blueberry sauce. Store in an airtight container in the refrigerator.
Step 4: Churn the ice cream, and assemble the cake (see directions), then freeze.
Step 5: When ready to serve, make whipped cream and top with whipped cream and berries.
What You’ll love about this recipe
It’s delicious! I wasn’t sure how this recipe would turn out and if all of the flavors would come through, but it was the perfect balance of creamy, fruity, and citrusy. Everyone couldn’t stop talking about how much they loved it.
The texture is excellent. Not all sponges hold up well to freezing because butter seizes in the freezer and dries out the sponge. Due to the fact that this recipe is very low in fat from butter and relies on the fat in the dairy and eggs, the texture is still spongey and delicious.
It is festive. This recipe works all summer when the weather is warm and berries are at their best. I love putting fresh berries on top of a cake because they are so colorful, and have so much texture.
Frequently Asked Questions
Can it be made gluten-free? Yes! Substitute the flour for gluten-free all purpose flour 1:1, and add ½ tsp Xantham gum if the flour doesn’t already include it.
Can it be made in advance? I would make and assemble the cake in advance, and wait to top it with fresh whipped cream and the fresh berries until just before serving.
Can I substitute the berry sauce with jam? Jam is not a great substitute for the sauces because jam has a lower water content, and will get chewy in the freezer. The sauce is thin enough so that it soaks into the sponge while still maintaining a syrup like texture to blend with the ice cream.
Why do I have to chill the ice cream base for 8 hours? Chilling the base ages it, and allows the milk proteins to relax so you get a creamier ice cream. If you are in a rush, you can also whisk the base over an ice bath until cool to the touch, and churn given the directions for your ice cream maker.
Can I freeze with the whipped cream? I recommend making fresh whipped cream to place on top. It will be easier to place the berries on top, and shape as needed.
Supplies needed
Hand or stand mixer: You technically could make the recipe without this equipment, but it would be quite the workout! Used for making the sponge and whipped cream.
9” cake pan or springform pan: Either works well here, I wouldn’t go bigger or smaller or you risk drying out or underbaking the cake. Larger would also create a thinner sponge, so it is difficult to cut.
Ice cream maker: You can use your favorite storebought or no churn recipe in place of this instead. I’ve had the older version of this Cuisinart ice cream maker for eleven years, and it’s still going strong.
Rubber spatula: For mixing and scraping throughout the recipe so you’re not wasting anything that gets stuck to the sides of the bowl.
Kitchen scale: For measuring the flour, you can also fluff with a fork and spoon into a measuring cup, but this is the most accurate way to measure flour.
Measuring spoons and cups: For measuring wet and dry ingredients
Ingredients
Cake
1 cup (136gr) All-purpose Flour
1 teaspoon Baking Powder
1 cup Granulated Sugar
1/4 teaspoon Sea Salt
2 Clementines or 1 orange
1/2 cup Whole or 2% Milk
2 tablespoons Unsalted Butter
2 Large Eggs, at room temperature
Vanilla Ice cream
2 cup Whole Milk
3 tablespoons Corn Syrup or Golden Syrup
3 tablespoons Nonfat Milk Powder
¾ cup Granulated Sugar
3 Large Egg Yolks
½ teaspoon Sea Salt
2 ¼ teaspoon Vanilla Extract
2 ¼ teaspoon Vanilla Bean Paste
2 cups Heavy Cream
Strawberry Sauce
1 cup Strawberries (halved, and tops removed)
½ cup Granulated Sugar
2 tablespoons Lemon Juice
Blueberry Sauce
1 cup Blueberries
½ cup Granulated Sugar
2 tablespoons Lemon Juice
Whipped Cream
1 ½ cup Heavy cream
3 tablespoons Granulated Sugar
1 teaspoon Vanilla Extract
Pinch Sea Salt
Fresh strawberries and blueberries, for topping
Directions
Make the ice cream base
Crack three eggs carefully and place yolks in a medium heat proof bowl.
Add milk and corn syrup to medium saucepan then whisk in sugar and dried milk. Use a sifter if the milk powder has hardened and has chunks. Stir and heat on medium low until sugar is dissolved, about 2-3 minutes.
Temper the eggs. Pour one cup of hot milk mixture into a glass measuring cup with a pourable spout.
Very slowly, pour a small stream of the hot milk into the egg yolks while whisking quickly. You don’t want to add the milk too quickly otherwise you’ll cook the eggs. Continue pouring and whisking until you have added the entire cup. Then pour the entire mixture back into the pan.
Make the custard. Cook for about ten minutes over medium heat. Stir frequently, scraping the bottom occasionally testing occasionally to see if the custard has set. If it starts to simmer turn down the heat. You will know it has cooked for long enough when the mixture coats the back of a wooden spoon and you can draw a line through it that doesn’t run.
Once it is done, remove from heat and whisk in heavy cream, sea salt, vanilla extract and vanilla bean paste. Cover with plastic wrap and chill in the fridge for 6-8 hours up to 2 days. Alternatively, to speed up the process, whisk over an ice bath until ice cold. Wait to churn until you have made the other components and are ready to assemble the cake.
Make the sponge
Prepare. Preheat oven to 350°F (176°C), and adjust a rack to the center of the oven. Coat a 9” round cake pan or springform with butter, flour, and a parchment round on the bottom.
Mix dry ingredients. Sift together flour, sea salt, and baking powder, in a small bowl and set aside. Use a baking scale for the most accurate measurement of flour.
Prepare wet ingredients. In a medium bowl that can be used with a hand mixer (or in your stand mixer bowl), add the sugar. Zest the orange/clementine into the sugar. Rub together the sugar and zest until the mixture resembles wet sand.
Heat the milk and butter in a small saucepan until it just starts to steam and the butter is melted. Remove from heat and set aside.
Add eggs to the sugar, and beat on medium high speed for 5 minutes until the mixture appears pale and light.
Combine dry and wet ingredients. Then turn the mixer to low, and add the dry ingredients in three additions. Do not overmix.
Check that the milk mixture is still hot, and reheat if necessary. Steadily pour the hot milk and butter into the batter and mix until only streaks of flour remain. Finish the mixing by hand with a rubber spatula, scraping the bottom of the bowl to be sure it’s evenly mixed.
Add the batter to the prepared panm and spread into an even layer.
Bake for 23-25 minutes until the cake is springy when touched in the middle and pulls away from the sides of the pan.
Let the cake cool in the pan for 5 minutes before inverting onto a cooling rack then carefully flipping back so it’s right side up. Let cool to room temperature. If making more than a day in advance, cut in half to create a top and bottom layer, then place a piece of parchment paper in between. Wrap in plastic wrap and freeze until ready to use.
Make the berry sauces.
The recipes are the same for both sauces. Wash and remove any stems from the fruit then add to a medium sauce pan with lemon juice and sugar. Heat on medium until the berries begin to burst, then reduce heat to medium low to simmer for about 15 minutes, stirring occasionally. You do not want it to boil. Store separately in an airtight container in the fridge until ready to use, stays fresh for up to two weeks.
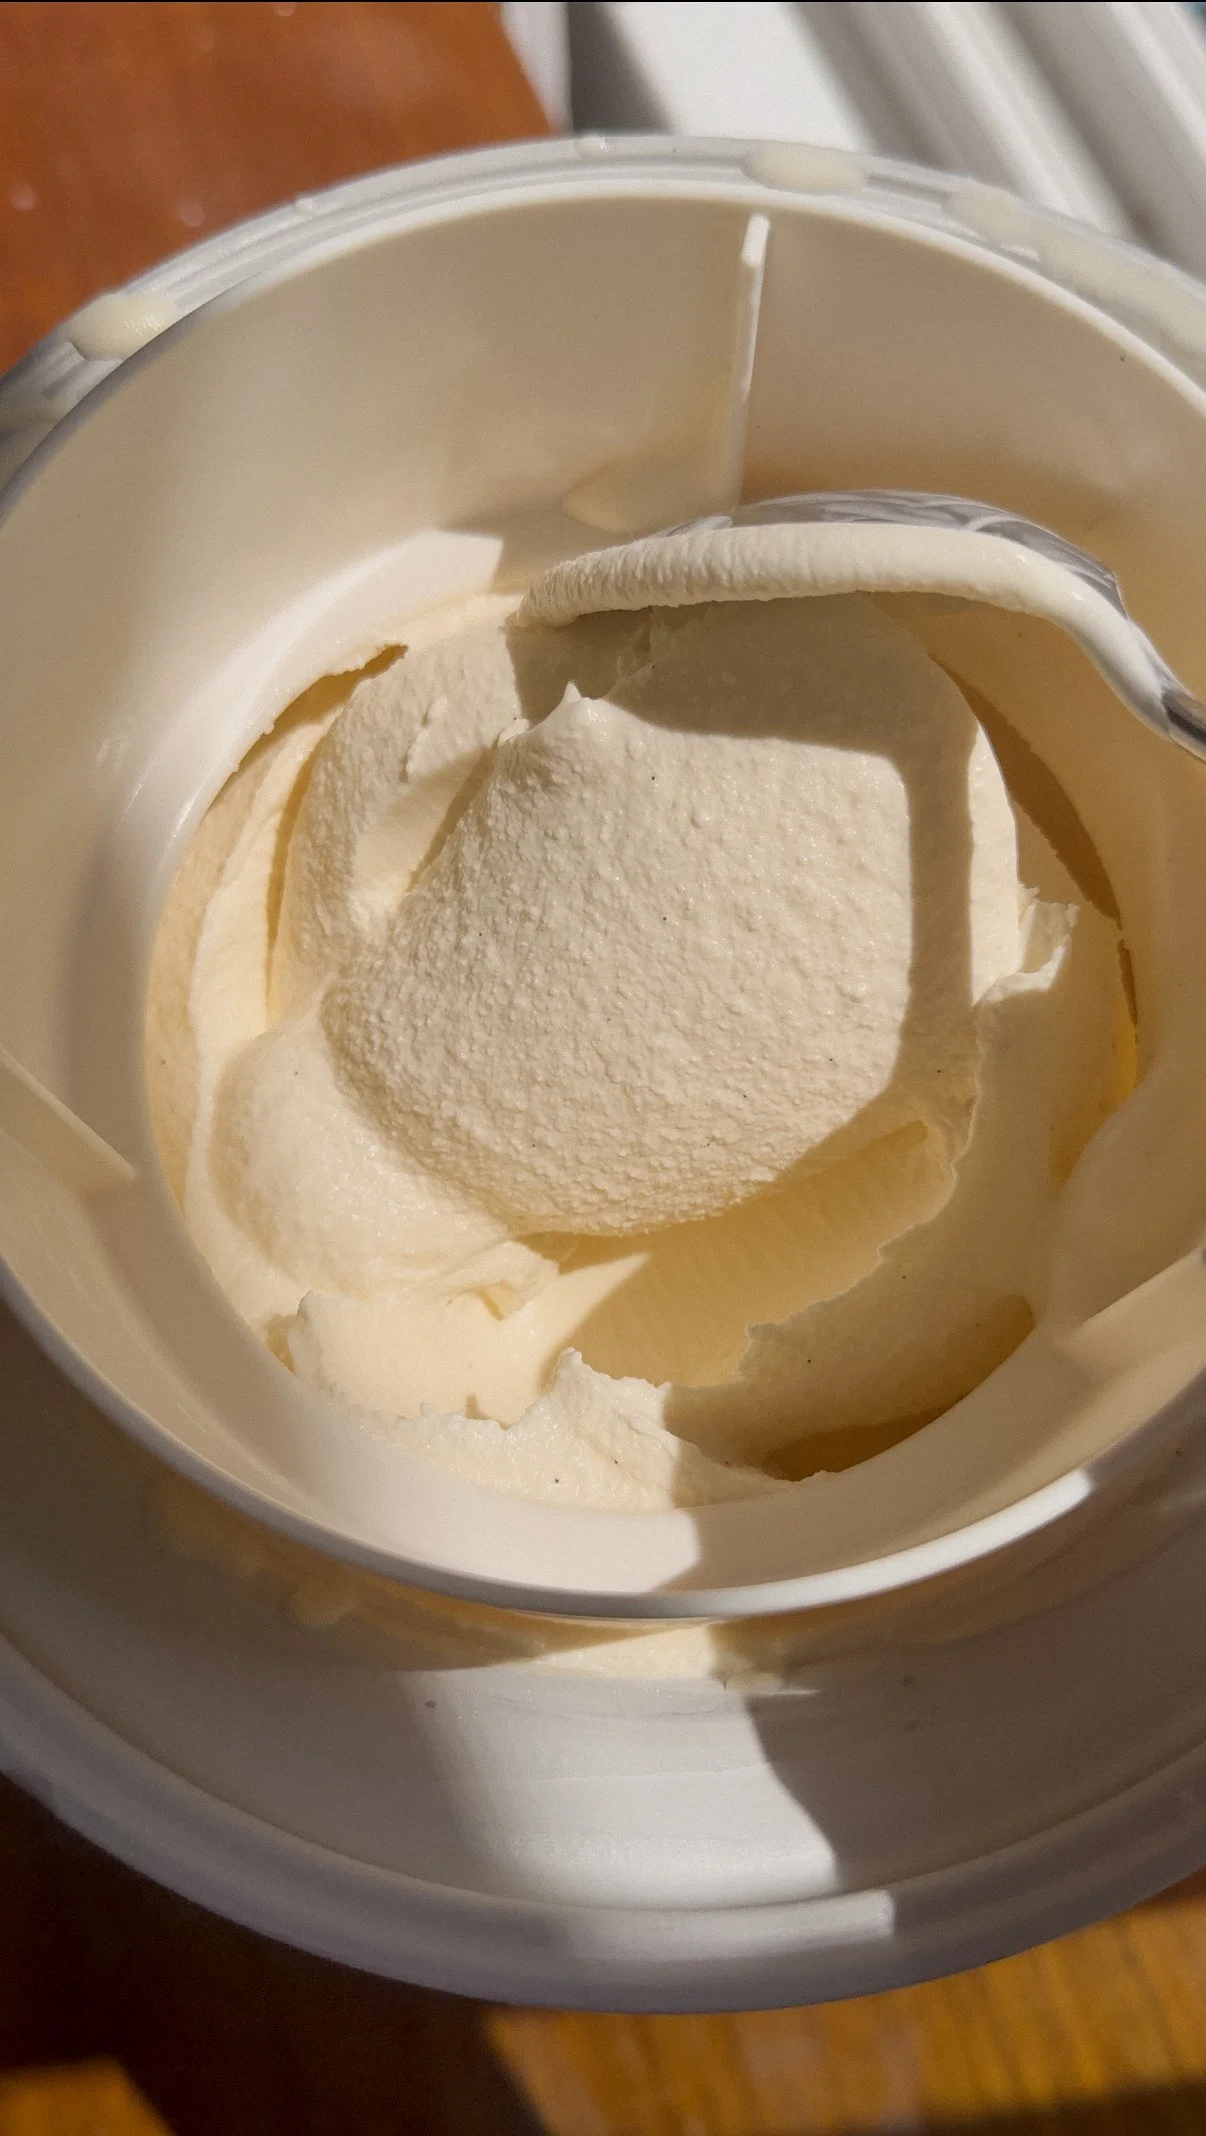
Churn the ice cream.
When you are ready to assemble the cake, churn the ice cream per the directions for soft serve consistency (for my ice cream maker it takes about thirty minutes).
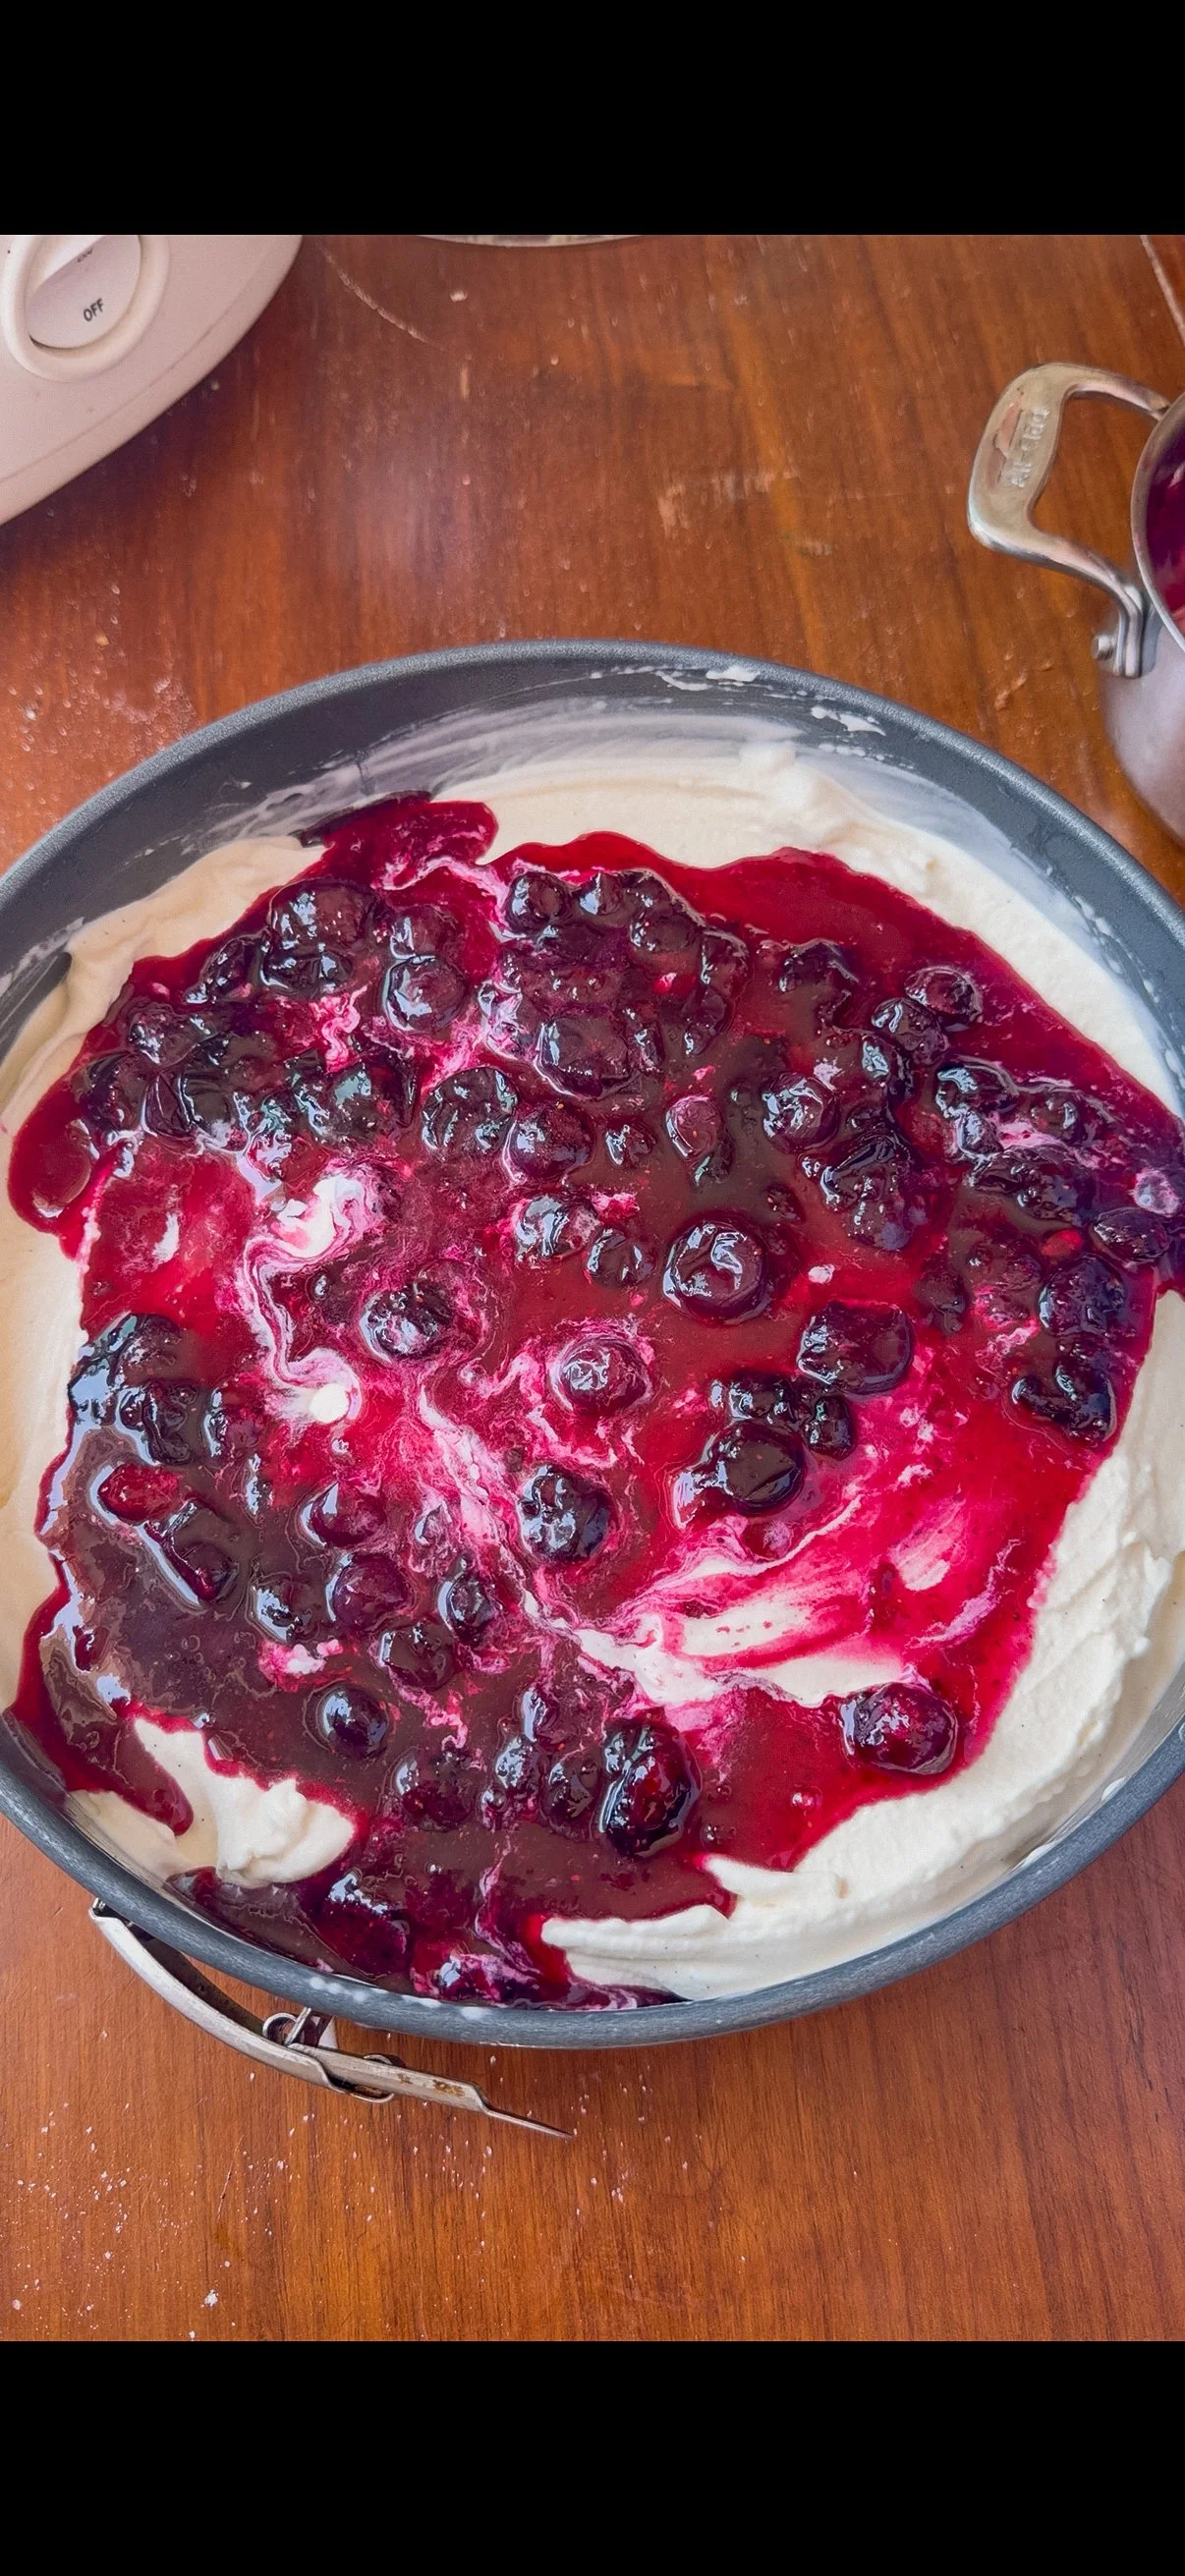
Assemble the cake.
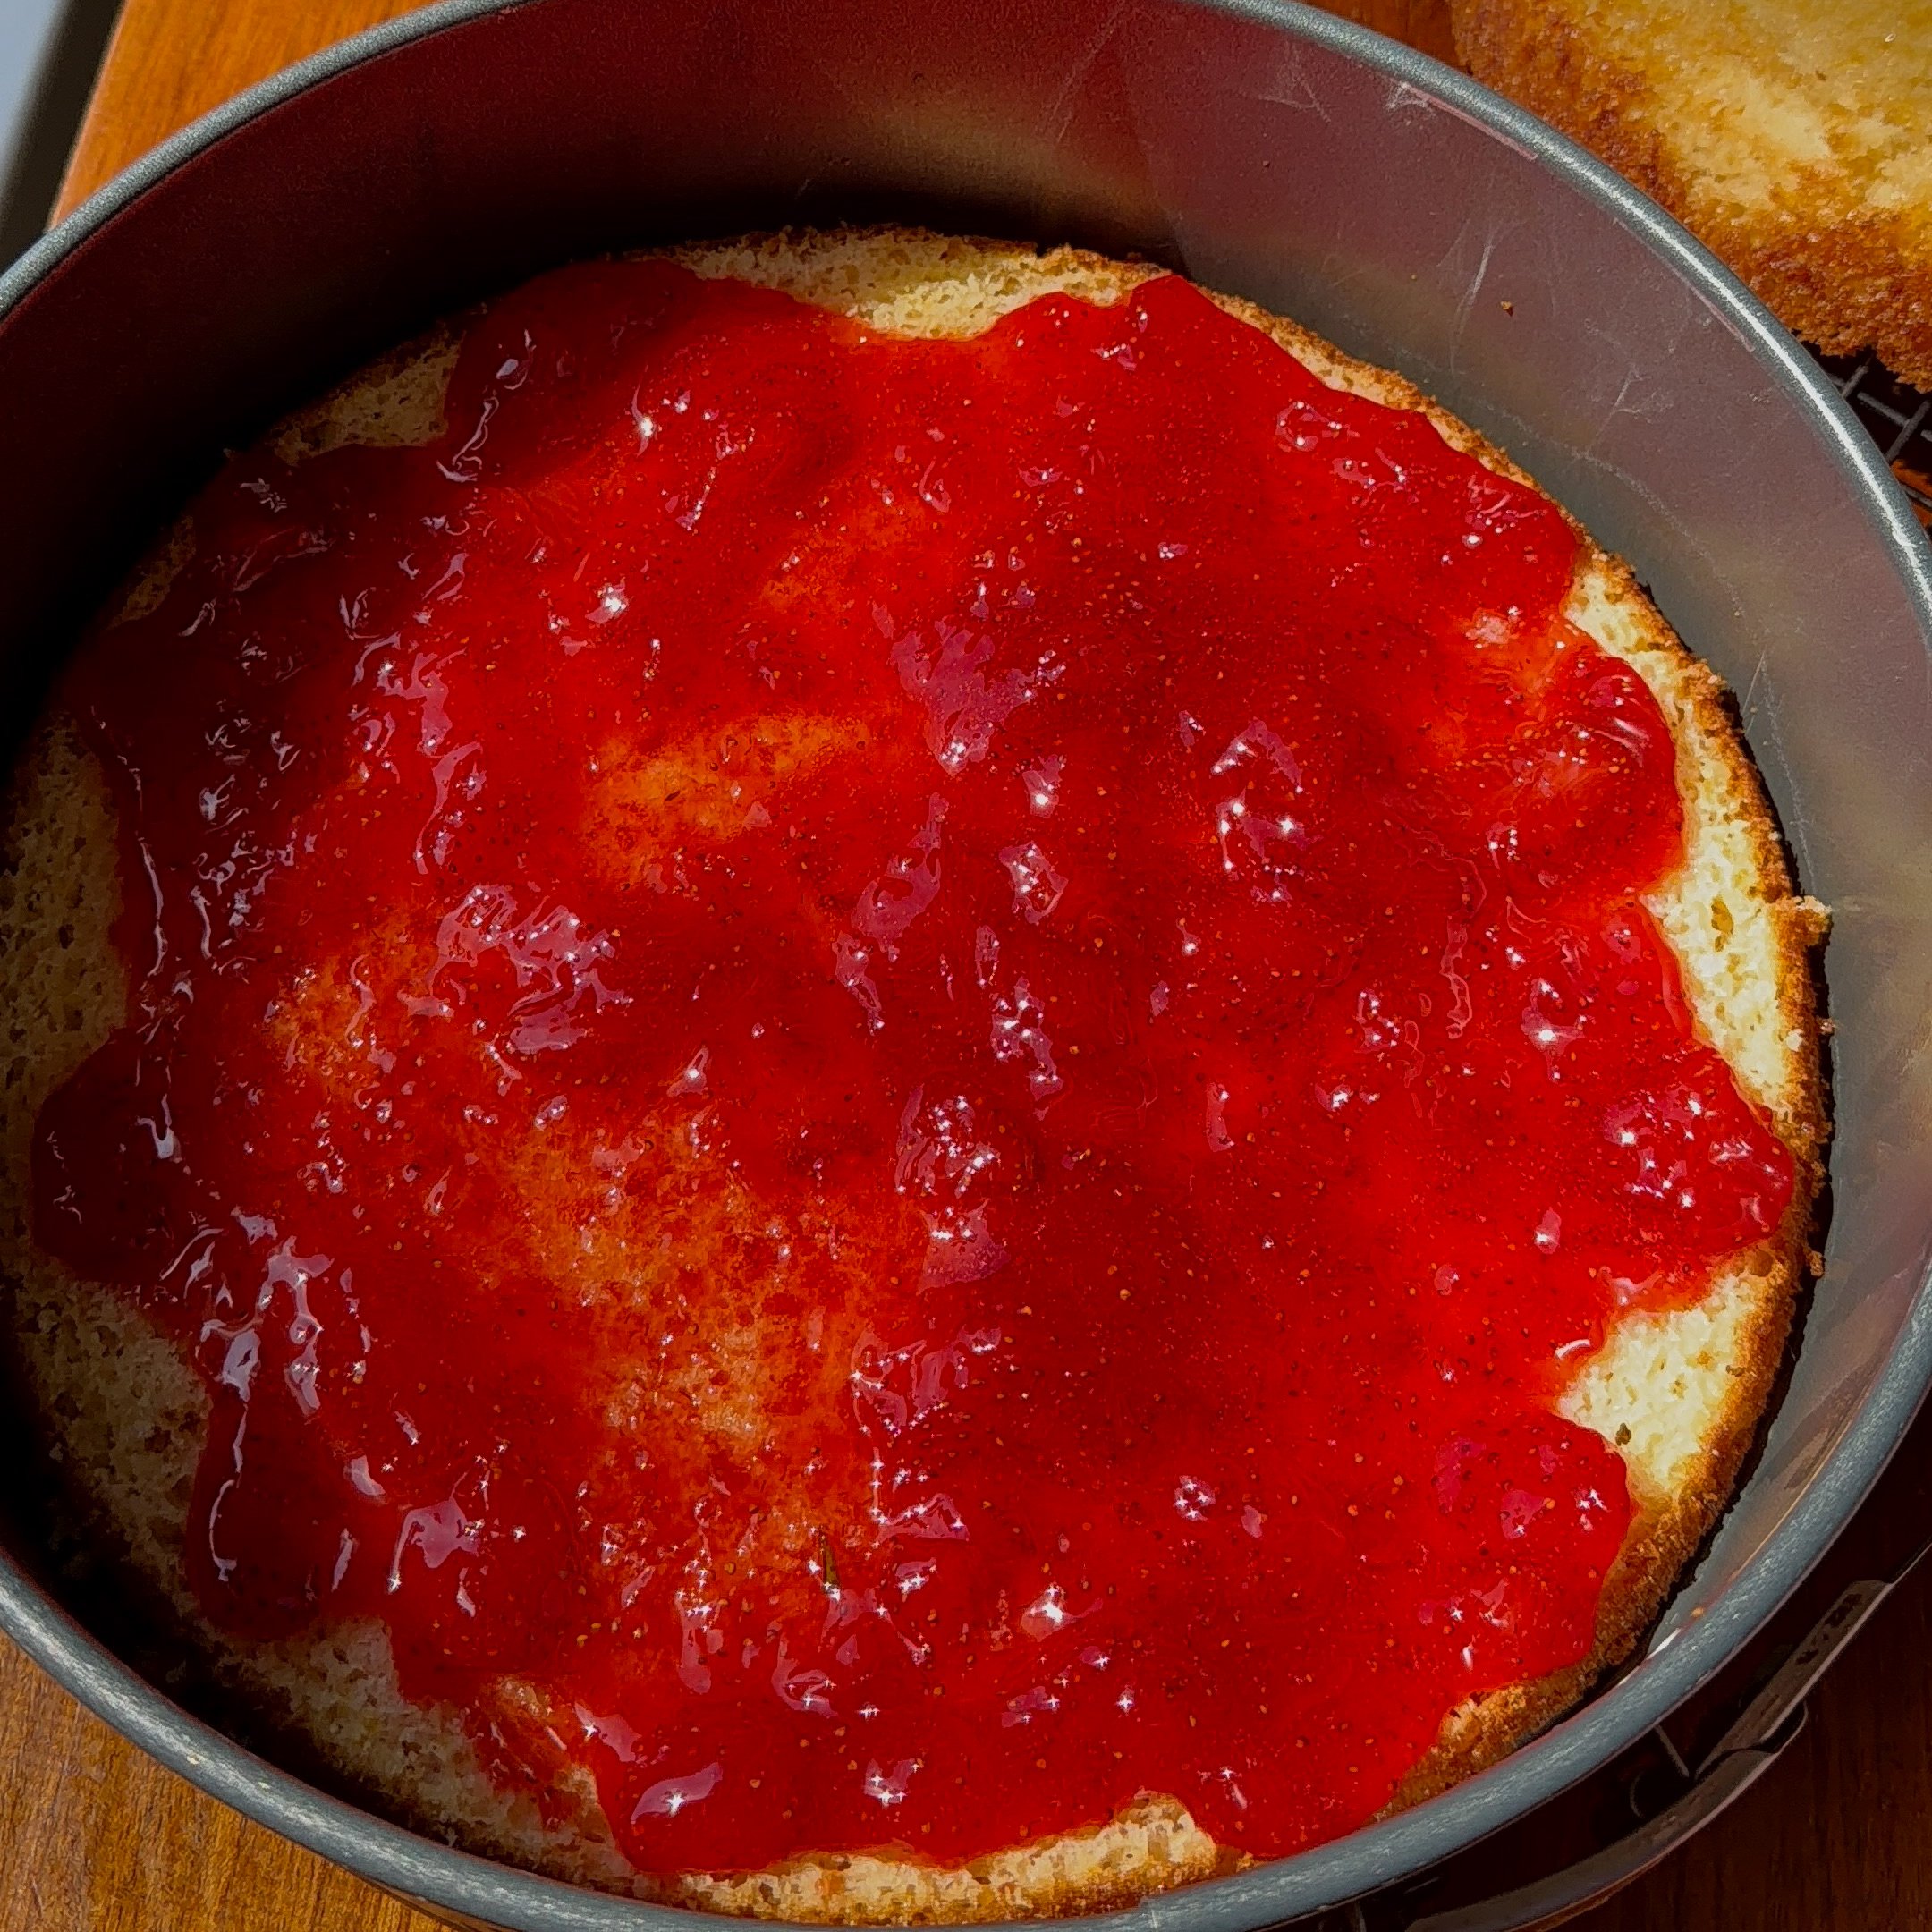
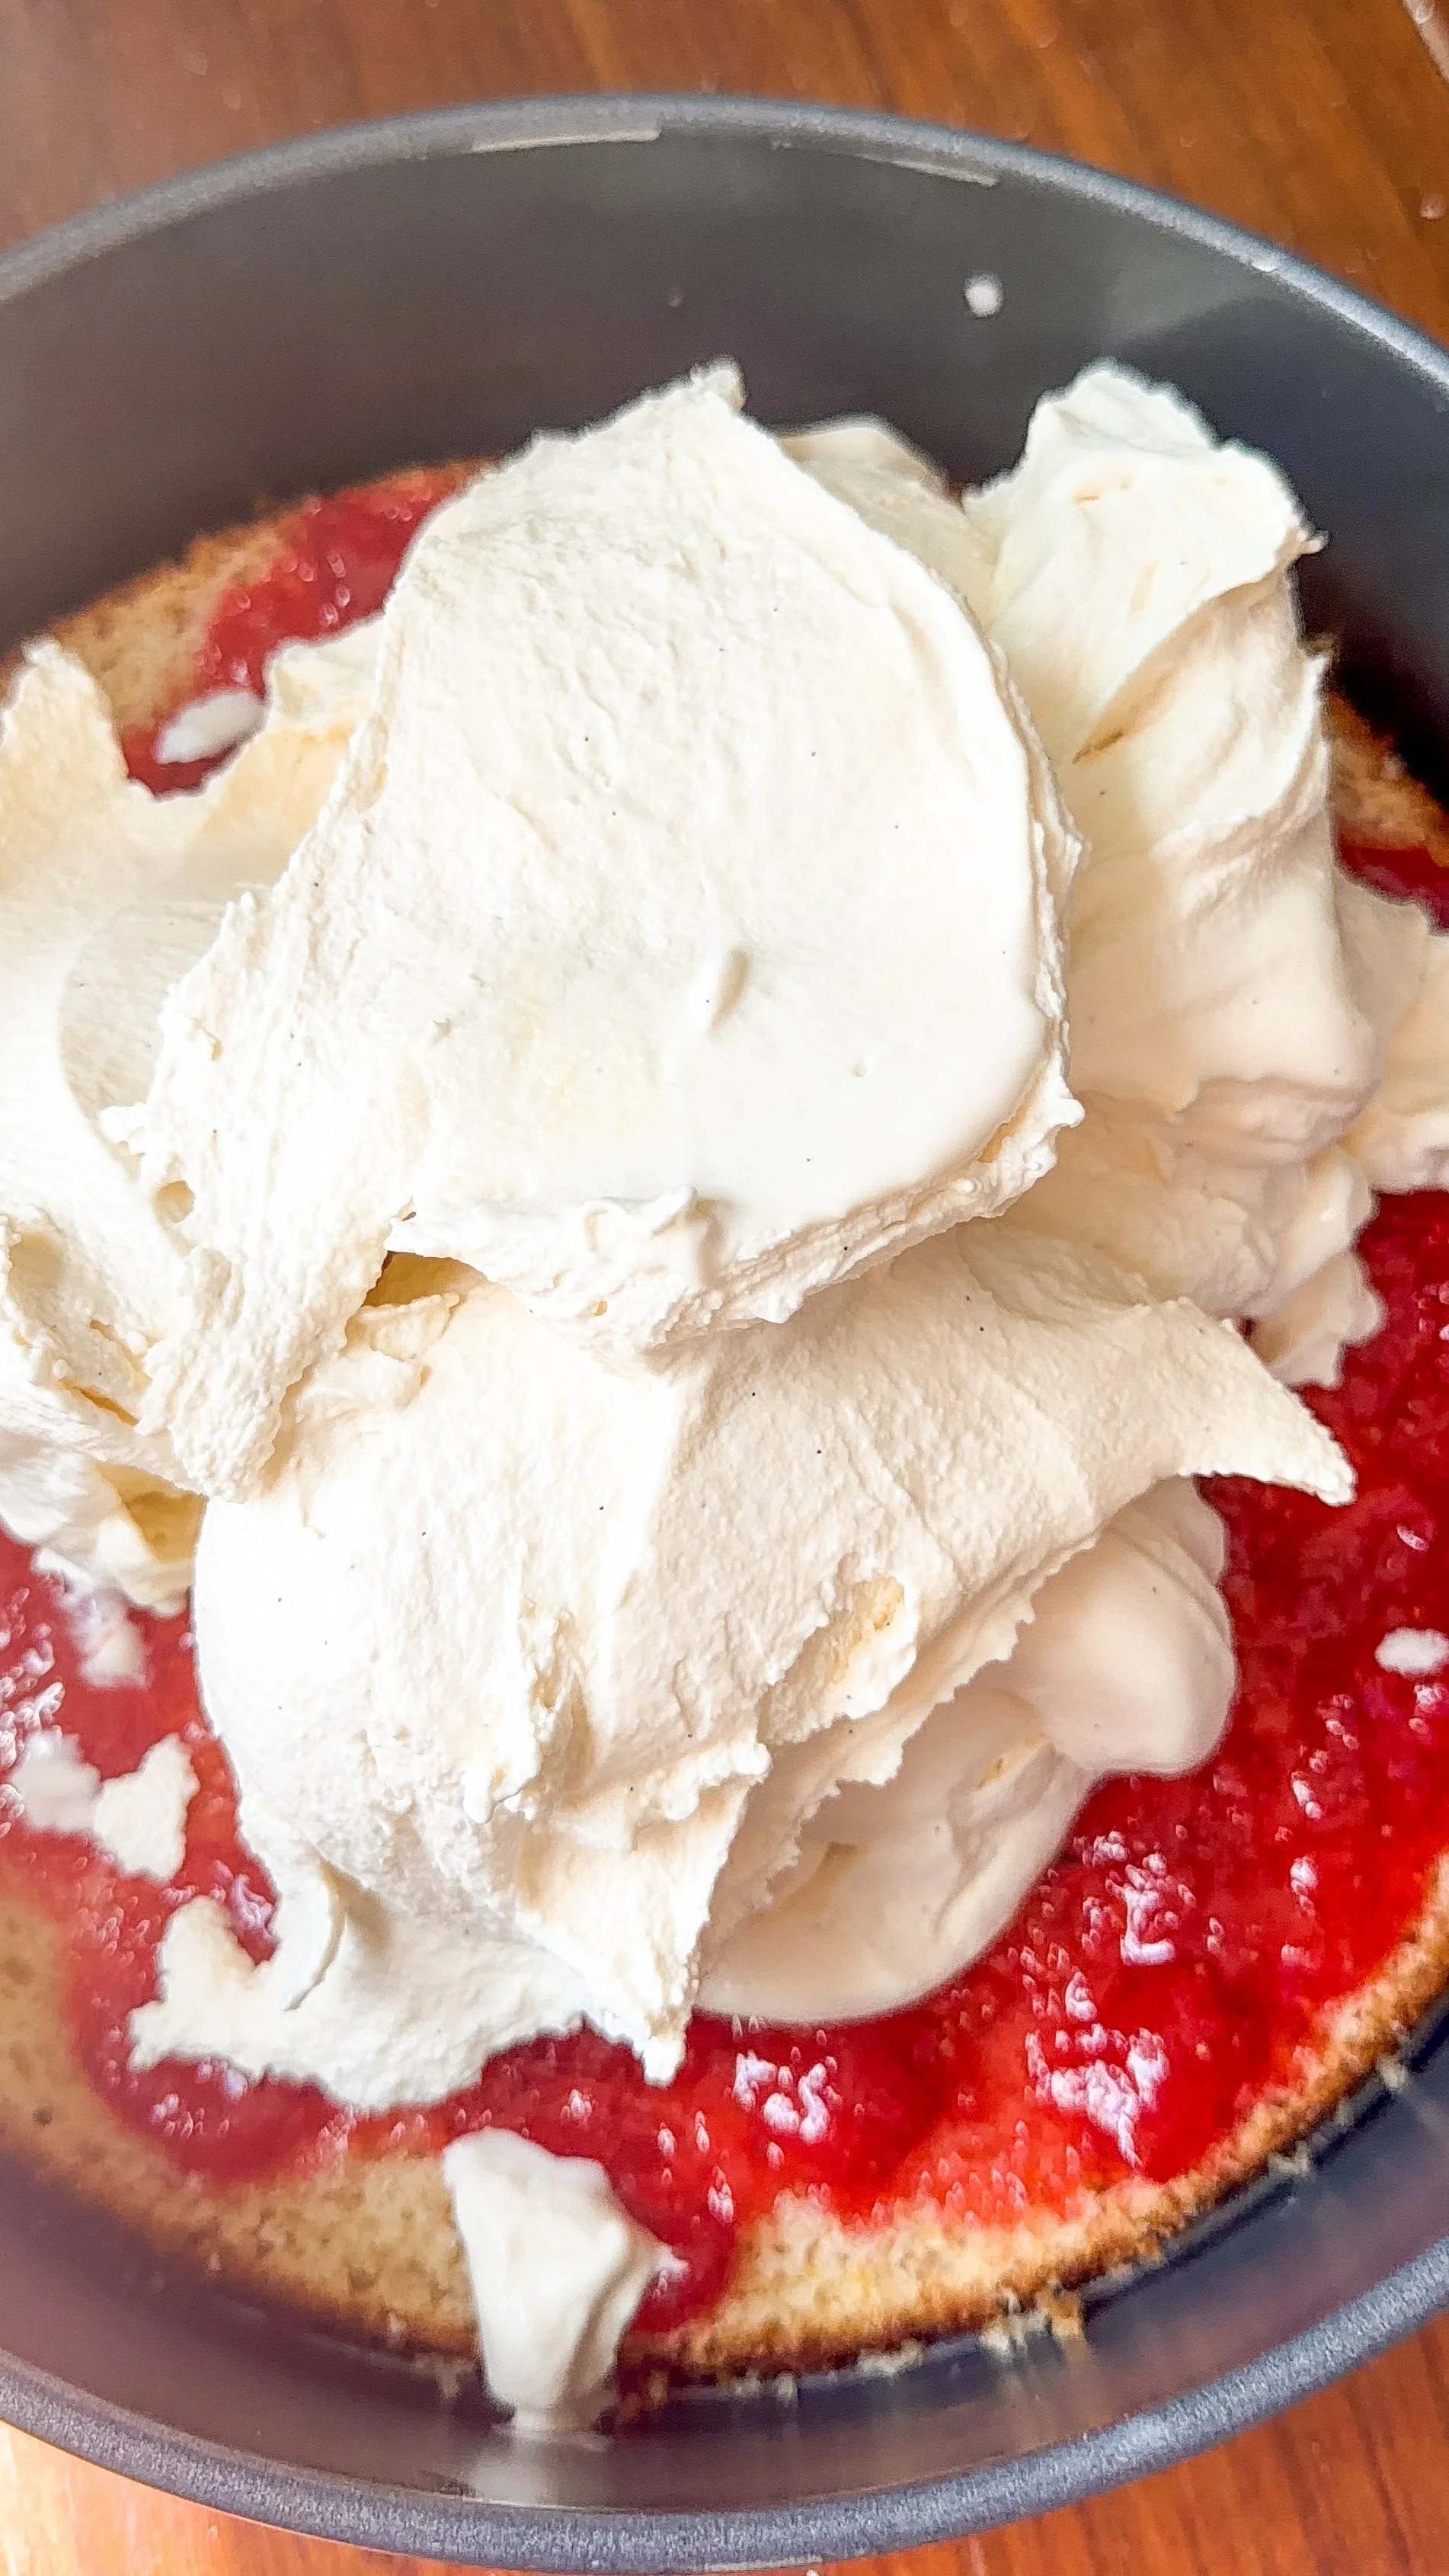
While the ice cream is churning, cut the sponge in half to create two layers if you haven’t already. Place the bottom half in the springform pan to use it as a mold. Spread the blueberry sauce across the bottom of the sponge. Place in the freezer for ten minutes to chill.
Once the ice cream is done churning, spread across the bottom layer of the cake. Spread the strawberry sauce on top of the ice cream, and place the top layer of the sponge on top. Technically I did it in the opposite order, as you can see in the pictures above. Freeze until ready to serve, for a minimum of six hours.
Make the whipped cream.
Add heavy cream to a mixing bowl with vanilla and sea salt. Don’t be afraid of using the salt, it adds complexity to the whipped cream, and you won’t be able to taste it. Using a hand mixer or stand mixer mix on low until it starts to thicken then turn to high. When it starts to reach soft peaks, add the granulated sugar. Whip on high for about thirty more seconds for stiff peeks, being careful to not over whip. If you do overwhip, add a splash of cream and slowly whisk together. Taste and add more sugar if needed. Don’t make more than two hours in advance or it will start to separate. Refrigerate until ready to use.
Top the cake.
When you’re ready to serve, top the cake with prepared whipped cream and fresh blueberries and strawberries. I also included sparkler candles for a festive touch. Store any remaining pieces in the freezer for up to one month.

Red, White, and Blue Ice Cream Cake
Spongey vanilla cake flavored with citrus zest, a homemade vanilla bean ice cream filling, and strawberry and blueberry sauce. Top with whipped cream and fresh berries for the perfect celebratory summer dessert. Serves 10.
Ingredients
Instructions
- Crack three eggs carefully and place yolks in a medium heat proof bowl.
- Add milk and corn syrup to medium saucepan then whisk in sugar and dried milk. Use a sifter if the milk powder has hardened and has chunks. Stir and heat on medium low until sugar is dissolved, about 2-3 minutes.
- Temper the eggs. Pour one cup of hot milk mixture into a glass measuring cup with a pourable spout.
- Very slowly, pour a small stream of the hot milk into the egg yolks while whisking quickly. You don’t want to add the milk too quickly otherwise you’ll cook the eggs. Continue pouring and whisking until you have added the entire cup. Then pour the entire mixture back into the pan.
- Make the custard. Cook for about ten minutes over medium heat. Stir frequently, scraping the bottom occasionally testing occasionally to see if the custard has set. If it starts to simmer turn down the heat. You will know it has cooked for long enough when the mixture coats the back of a wooden spoon and you can draw a line through it that doesn’t run.
- Once it is done, remove from heat and whisk in heavy cream, sea salt, vanilla extract and vanilla bean paste. Cover with plastic wrap and chill in the fridge for 6-8 hours up to 2 days. Alternatively, to speed up the process, whisk over an ice bath until ice cold. Wait to churn until you have made the other components and are ready to assemble the cake.
- Preheat oven to 350°F and move a rack to the center of the oven. Prep a 9” round pan or springform with butter, flour, and a parchment round at the bottom.
- Sift together flour, sea salt, and baking powder in a small bowl.
- In a medium bowl that can be used with a hand mixer (or in your stand mixer bowl), add the sugar and orange/clementine zest. Rub together with your fingertips until the mixture resembles wet sand.
- Heat the milk and butter in a small saucepan until it just starts to steam and the butter is melted. Remove from heat.
- Add eggs to the bowl with the sugar zest mixture and beat on medium high speed for 5 minutes until the mixture appears pale and light.
- Turn the mixer to low and add the dry ingredients in three additions.
- Check that the milk is still hot, and if not reheat. Steadily pour the hot milk and butter into the batter and mix until only streaks of flour remain. Finish the mixing by hand with a rubber spatula, scraping the bottom of the bowl to be sure it’s evenly mixed.
- Add the batter to the prepared pan and make sure it’s an even layer.
- Bake for 23-25 minutes until the cake is springy when touched, and pulls away from the sides of the pan.
- Let the cake cool in the pan for 5 minutes before inverting onto a cooling rack then carefully flipping back so it’s right side up.
- Wash and remove any stems from the strawberries then add to a medium sauce pan with lemon juice and sugar.
- Heat on medium until the berries begin to burst, then reduce heat to medium low to simmer for about 15 minutes, stirring occasionally. You do not want it to boil. Store separately in an airtight container in the fridge until ready to use, stays fresh for up to two weeks.
- Repeat these steps for the blueberry sauce.
- When you are ready to assemble the cake, churn the ice cream per the directions for soft serve consistency (for my ice cream maker it takes about thirty minutes).
- While the ice cream is churning, cut the sponge in half to create two layers if you haven’t already. Place the bottom half in the springform pan to use it as a mold. Spread the blueberry sauce across the bottom of the sponge. Place in the freezer for ten minutes to chill.
- Once the ice cream is done churning, spread across the bottom layer of the cake. Spread the strawberry sauce on top of the ice cream, and place the top layer of the sponge on top. Freeze until ready to serve, for a minimum of six hours.
- Add heavy cream to a mixing bowl with vanilla and sea salt. Using a hand mixer or stand mixer mix on low until it starts to thicken then turn to high.
- When it starts to reach soft peaks, add the granulated sugar. Whip on high for about thirty more seconds for stiff peeks, being careful to not over whip. If you do overwhip, add a splash of cream and slowly whisk together. Taste and add more sugar if needed.
- Don’t make more than two hours in advance or it will start to separate. Refrigerate until ready to use.
- When you’re ready to serve, top the cake with prepared whipped cream and fresh blueberries and strawberries.
Notes
Adapted from Dorie Greenspan's “Curd, Cream, and Berry Cake” from her delightful book, Baking with Dorie
Stabilized whipped cream recipe from Buttermilk by Sam